
Carbon Dioxide Sensor MH-Z19b - Part 2 - Software
Part 1 - Hardware design
Prototype projects do not require complex software and I am using the Arduino framework because it has plenty of useful libraries for all possible device types. For compiling the project I am using PlatformIO framework.
Getting data from the sensor
There is a nice library for the MH-Z19b sensors for the Arduino framework. To use it in the project update platformio.ini file in the root of the project.
lib_deps =
    MHZ19
The sketch for testing the sensor and displaying the CO2 concentration in the serial console is very simple. As the hardware UART is already occupied by programmer and serial console I am using Software Serial to get data from the MH-Z19b.
#include <Arduino.h>
#include <SoftwareSerial.h>
#include <MHZ19.h>

SoftwareSerial swSerial(14, 16);
MHZ19 mhz19;

void setup()
{
	Serial.begin(115200);

    swSerial.begin(9600);
    mhz19.setSerial(&swSerial);
}

void loop()
{
	if (mhz19.isReady())
    {
    	int co2ppm = mhz19.readValue();

        Serial.print("CO2: ");
        Serial.println(co2ppm);
    }

    delay(1000);
}
Configuration
Using the sensor as a standalone device needs some configuration. Doing this by connecting to the computer and re-uploading firmware is not very convenient. However, the ESP8266 has onboard WiFi and can be configured over the network.
For configuration, I am using my own library called WiFiConfig.
To enable it - add the dependency to the platformio.ini file:
lib_deps =
    MHZ19
    [email protected]:snakeye/WiFiConfig.git
Then add the configuration to the main.cpp:
#include <WiFiConfig.h>
struct Config
{
struct CO2
{
int warning = 800;
int danger = 1400;
} co2;
} config;
ConfigManager configManager;
void setup()
{
// ...
configManager.setAPName("CO2 Sensor");
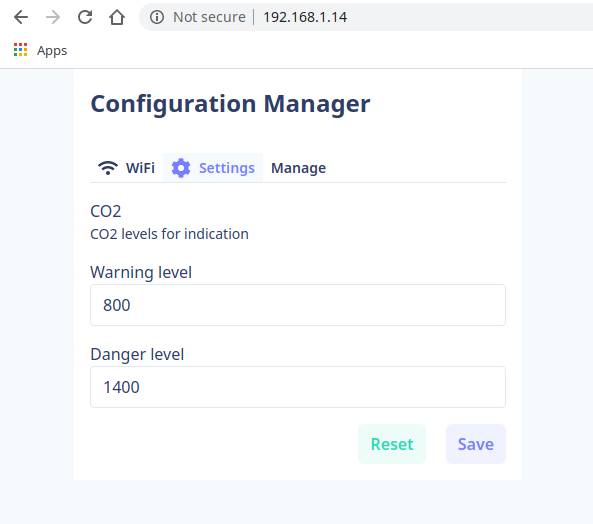
configManager.addParameterGroup("co2", new Metadata("CO2", "CO2 levels for indication"))
.addParameter("warning", &config.co2.warning, new Metadata("Warning level"))
.addParameter("danger", &config.co2.danger, new Metadata("Danger level"));
configManager.begin(config);
}
void loop()
{
// ...
configManager.loop();
}
Copy the index.html to the data folder:
cp .pio/libdeps/esp12e/WiFiConfig/data/index.html data/
And upload it to the devices’ SPIFSS file system:
pio run -t uploadfs
On reboot, the device will create an access point and you will be able to configure it with your browser by accessing address http://192.168.1.1:
Better loop
The configuration manager handler requires to be called pretty often, otherwise, the webpage will respond really slow, while the sensor value can be refreshed only every 10 or 15 seconds.
To make independent loops I am using a second library RecurringTask.
Update the platformio.ini file to add the dependency:
lib_deps =
    MHZ19
    [email protected]:snakeye/WiFiConfig.git
    RecurringTask
And enable separate loop in the main.cpp:
#include <RecurringTask.h>

void loop() {
	// ...
    RecurringTask::interval(10000, [&]() {
        if (!mhz19.isReady())
        {
            Serial.println("CO2 not ready");
            return;
        }

        int co2ppm = mhz19.readValue();
    }

     configManager.loop();

     delay(10);
}